AUDUSD swept hourly buyside liquidity during London session before reversing lower. After the higher timeframe alert from ScanLiquidity, lower timeframe confirmation formed through an iFVG reaction and bearish FVG rejection, leading to a clean 1:2 short setup.
HTF H1 Context
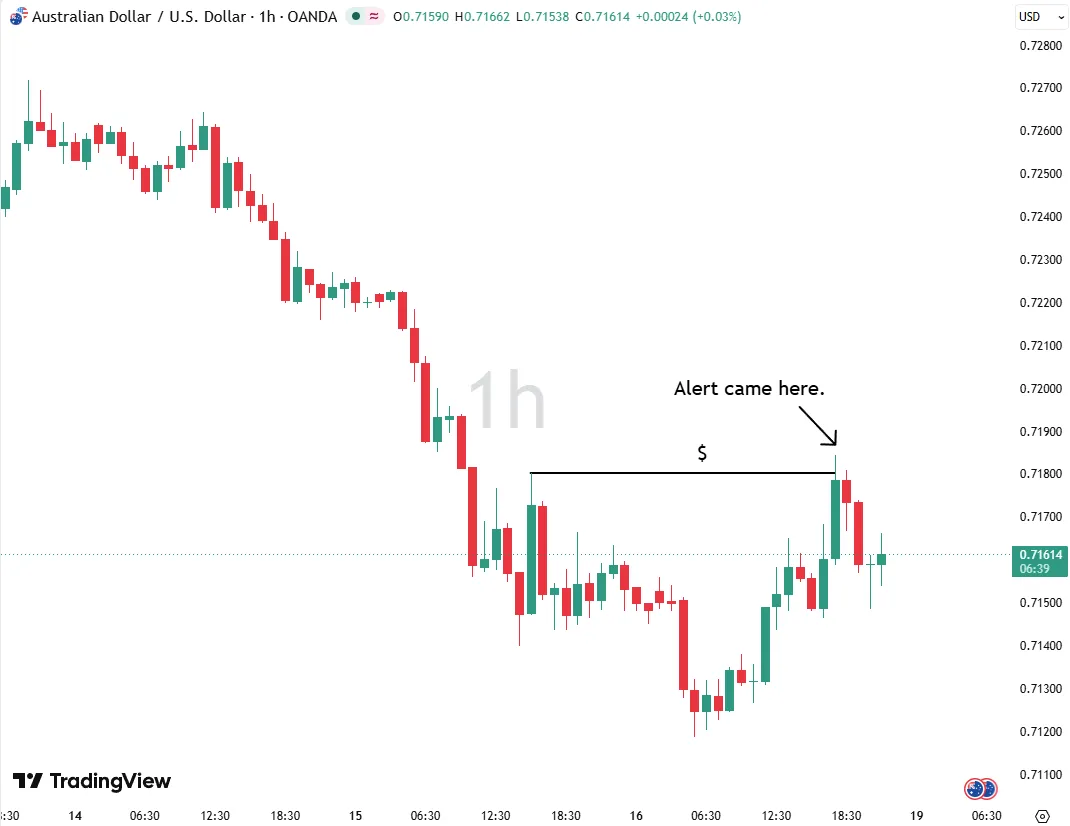
AUDUSD taking hourly buyside liquidity before reversing lower.
AUDUSD had already been trading weak on the higher timeframe for a while. During London session, price pushed into an hourly swing high and took buyside liquidity resting above the range.
Usually after a move like this, I pay close attention to how price reacts immediately after taking the highs. In this case, buyers failed to keep pushing price higher and the move started losing momentum pretty quickly.
That was the first sign for me that this could turn into a decent reversal setup instead of continuation higher.
This is where the ScanLiquidity H1 alert triggered.
The Alert
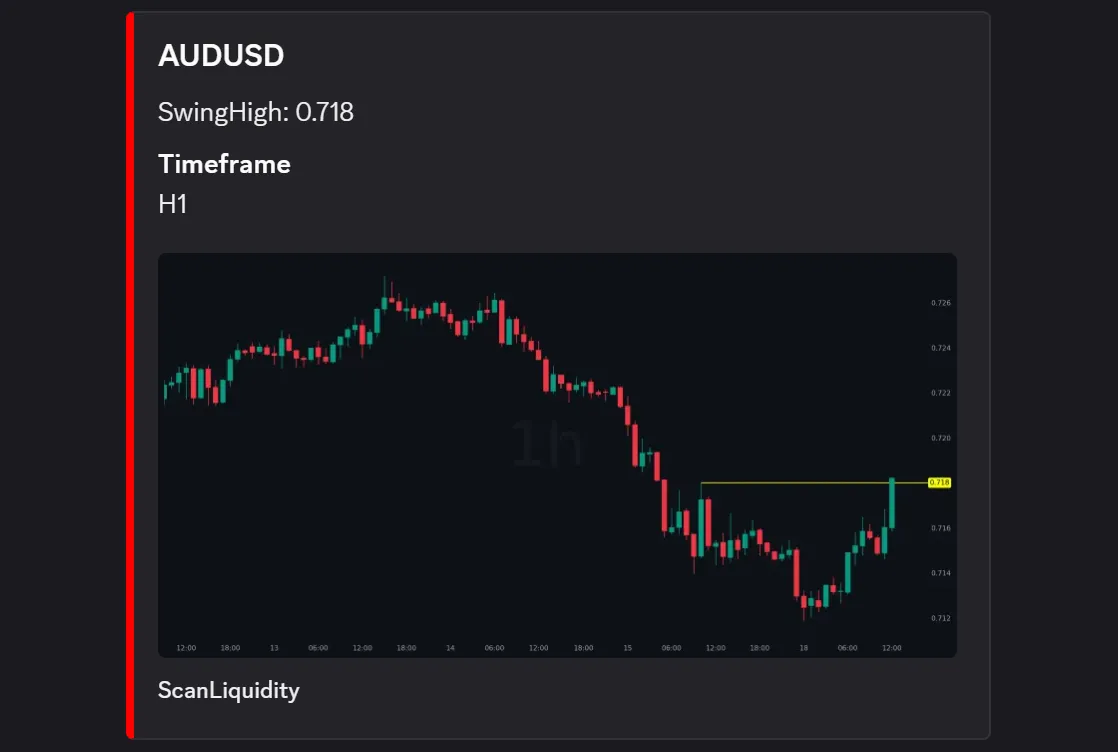
Real time hourly buyside liquidity alert triggered by ScanLiquidity.
The alert caught my attention because the liquidity sweep happened against the overall bearish higher timeframe structure.
But instead of blindly shorting right after the alert, I waited for lower timeframe confirmation first. I wanted to see some kind of rejection and structure weakness before looking for an entry.
M1 Execution
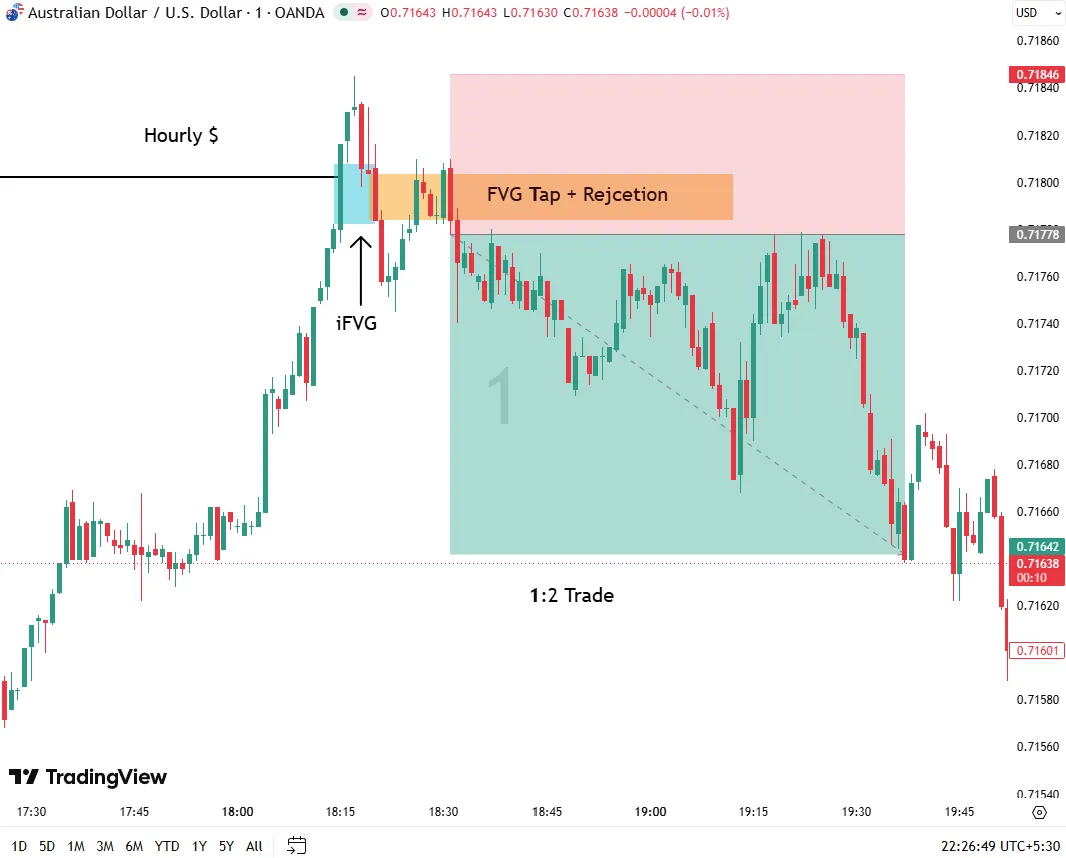
Bearish rejection after iFVG reaction and FVG tap on M1.
Here is how I approached the execution after the hourly buyside sweep:
-
iFVG Reaction
After taking the highs, price reacted sharply from the area and left behind an iFVG during the shift lower.
That reaction was the first thing that made me interested in shorts. -
FVG Formation
As price displaced lower, a clean bearish FVG formed on M1.
Instead of chasing the move, I waited for price to retrace back into the imbalance area. -
FVG Tap + Rejection
Price tapped the bearish FVG and reacted nicely from the zone.
That rejection became the confirmation for entry.
This one was relatively smooth after entry and respected the bearish structure well throughout the move.
Trade Summary
| Metric | Value |
|---|---|
| Pair | AUDUSD |
| Direction | Short |
| HTF Bias | Bearish |
| Entry Timeframe | M1 |
| Confirmation | iFVG + FVG rejection |
| Session | London |
| Risk Reward | 1:2 |
Why This Setup Worked
The higher timeframe structure already favored bearish continuation. Once price swept the hourly highs and failed to continue higher, the probability of reversal increased significantly.
The iFVG reaction gave the first hint of weakness, while the FVG retracement provided a cleaner and more controlled entry.
The combination of:
- Higher timeframe bearish structure
- Buyside liquidity sweep
- iFVG reaction
- Bearish displacement
- FVG tap and rejection
created a solid confluence based setup.
What Would Invalidate This Setup?
If price started accepting above the swept highs and held above the rejection area, the bearish setup would weaken significantly.
That would suggest buyers were still in control and the liquidity sweep failed to produce reversal.
For educational purposes only. Not financial advice.
